
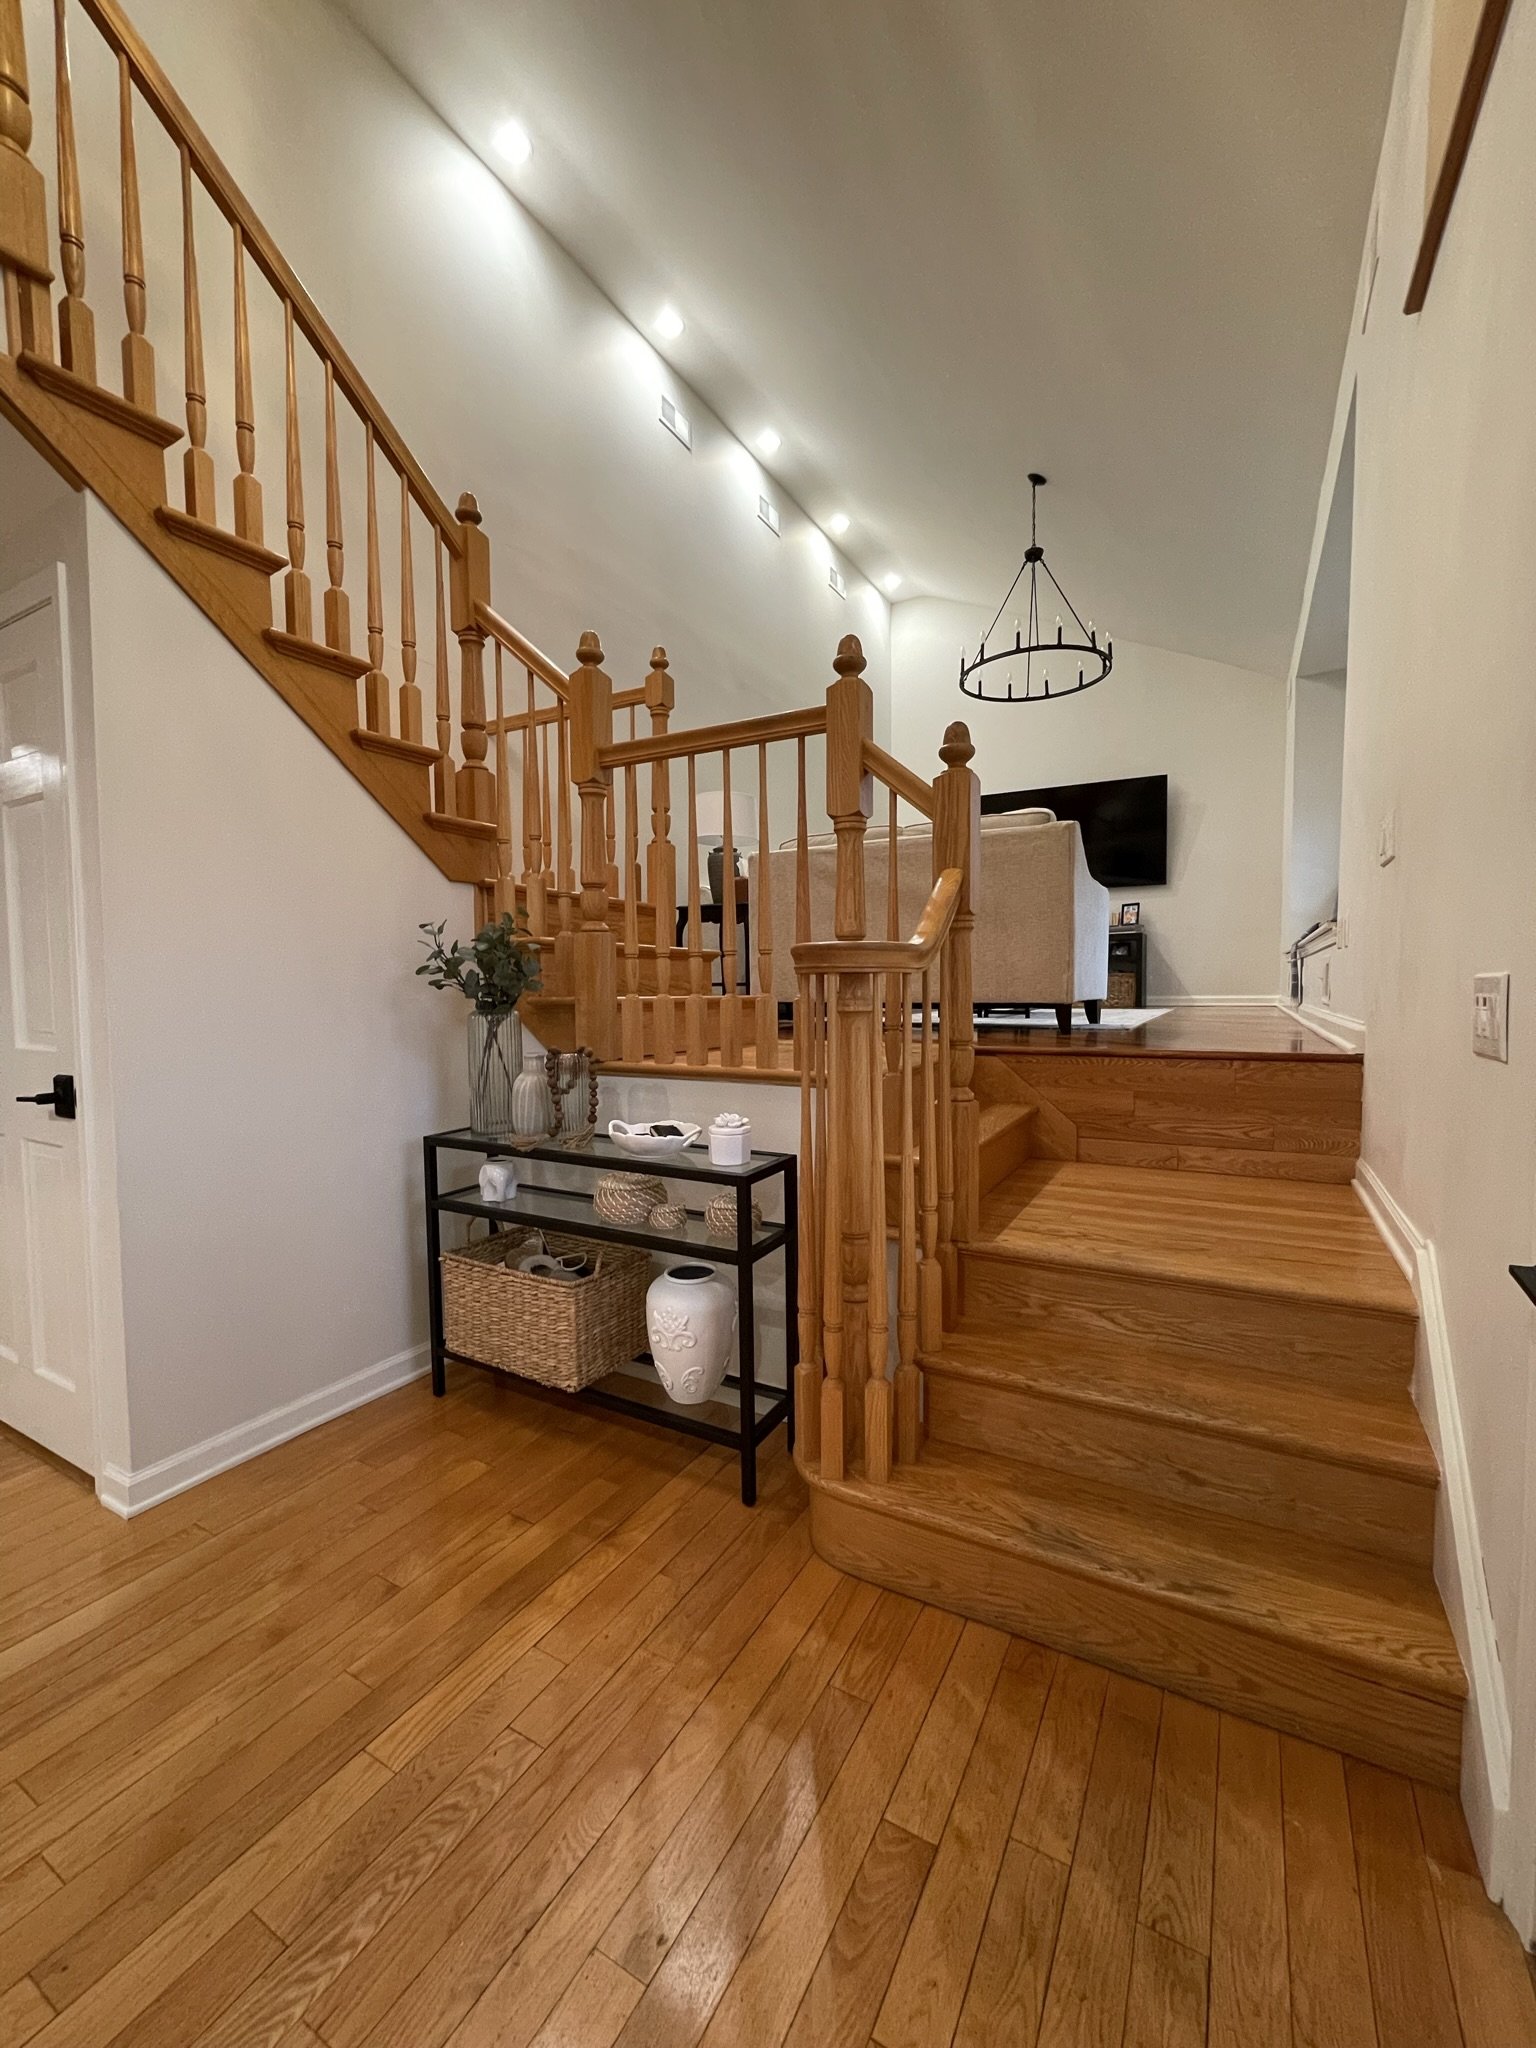
My Oak Staircase Makeover
Welcome back to Another DIY
A project I’ve been dying to tackle since we moved in, was always my stairs and I’ve totally put it off for the last year. Fully knowing how tedious and time consuming it would be, I just kept saying I’ll get to it soon. I have everything to do it, I’ll get to it eventually . The reason for painting my oak is just for the sheer fact that my home is a true 90s bi-level with oak everywhere! Wood flooring through-out the whole first and second floor even my kitchen and my cabinets are oak as well…. and listen I absolutely love having wood floors. I know one day I will be able to completely refinish them and it will look even better. Maybe one day I completely change my staircase and move it off the front door. The pervious owners didn’t truly take of it in the best way. There are deep rooted scratches and dirt I cant scrub out with a scrub brush for years now. When we first moved in 2 years ago, I had my entire family scrubbing the railings, spindles and cabinets with me to get all this thick residue and black gunk off of everything wood- it was horrible. But with that being said posting my Reels on instagram for this project, I got a lot of love and a lot of hate for painting my staircase white. “Why didn’t you just stain it”, “How dare you for ruining oak”, “It looked better before “ “Wrought Iron would’ve looked better” ALL the nonsense.
Now with the baby on the way it has kicked my ass into full gear and getting our home ready for this new transition. Really doing all the little projects I’ve had in my head that I can tackle while pregnant. I truly started this impulsively. I woke up one morning feeling pretty good and just started to tape all of the risers and side panels. Prep is the first step. and taping for this project was a huge task and took about two hours to completely tape from top to bottom. Being that I’m pregnant and promised Dan I would do this in stages and not kill myself. So I taped one day and primed risers and the side panels from bottom up, second day and I did one section of my landing and one section of the spindles and worked my way back down. The third day I primed all the spindles and posts and started early like 10:30 am to maybe 6 pm with an hour or two break to let Dan get on a ladder and do everything I couldn’t bend over or reach with my belly. Linking the primer here and on my Amazon finds!
After priming everything my contractor aka my dad came over to repair a broken spindle that was cracked and he wood filler and wood glued the spindle and then nailing in a couple of loose ones with brad nails that I found tiny wedges in while priming. LIFE SAVER. So four days total on prepping and priming to get this large staircase done. I put a pause on the stairs for the weekend to catch up on some laundry and cleaning everywhere else.


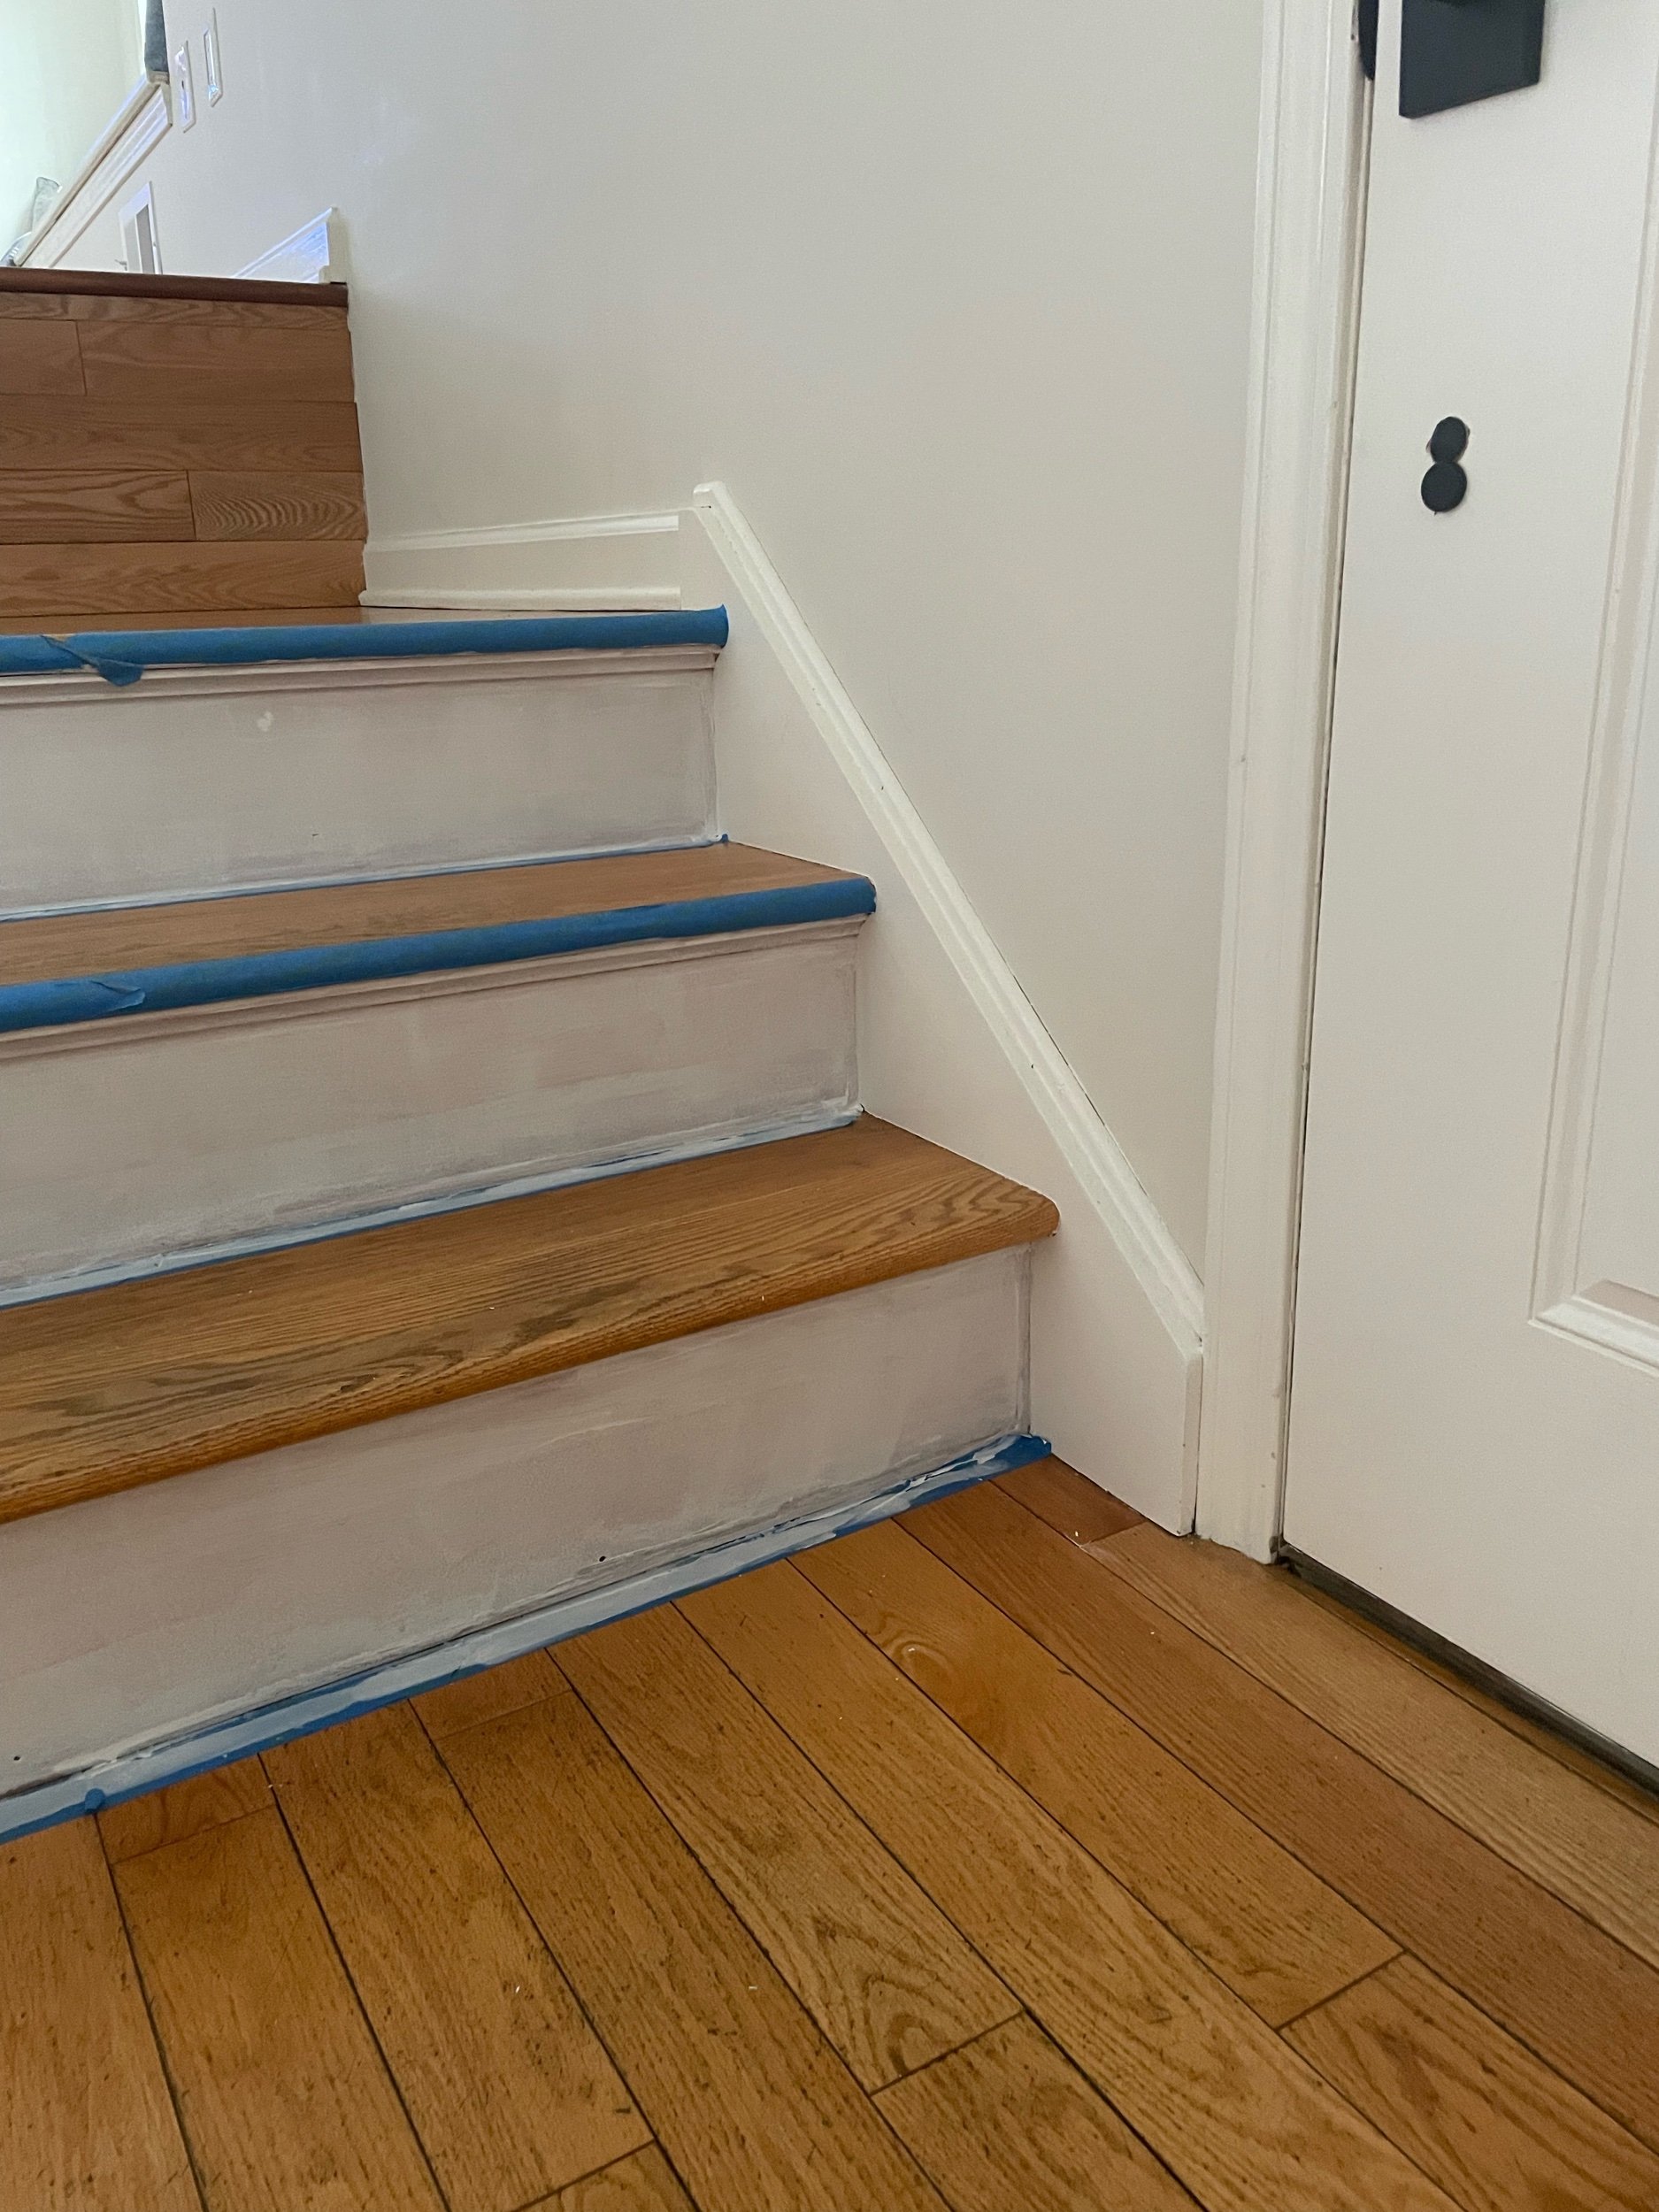

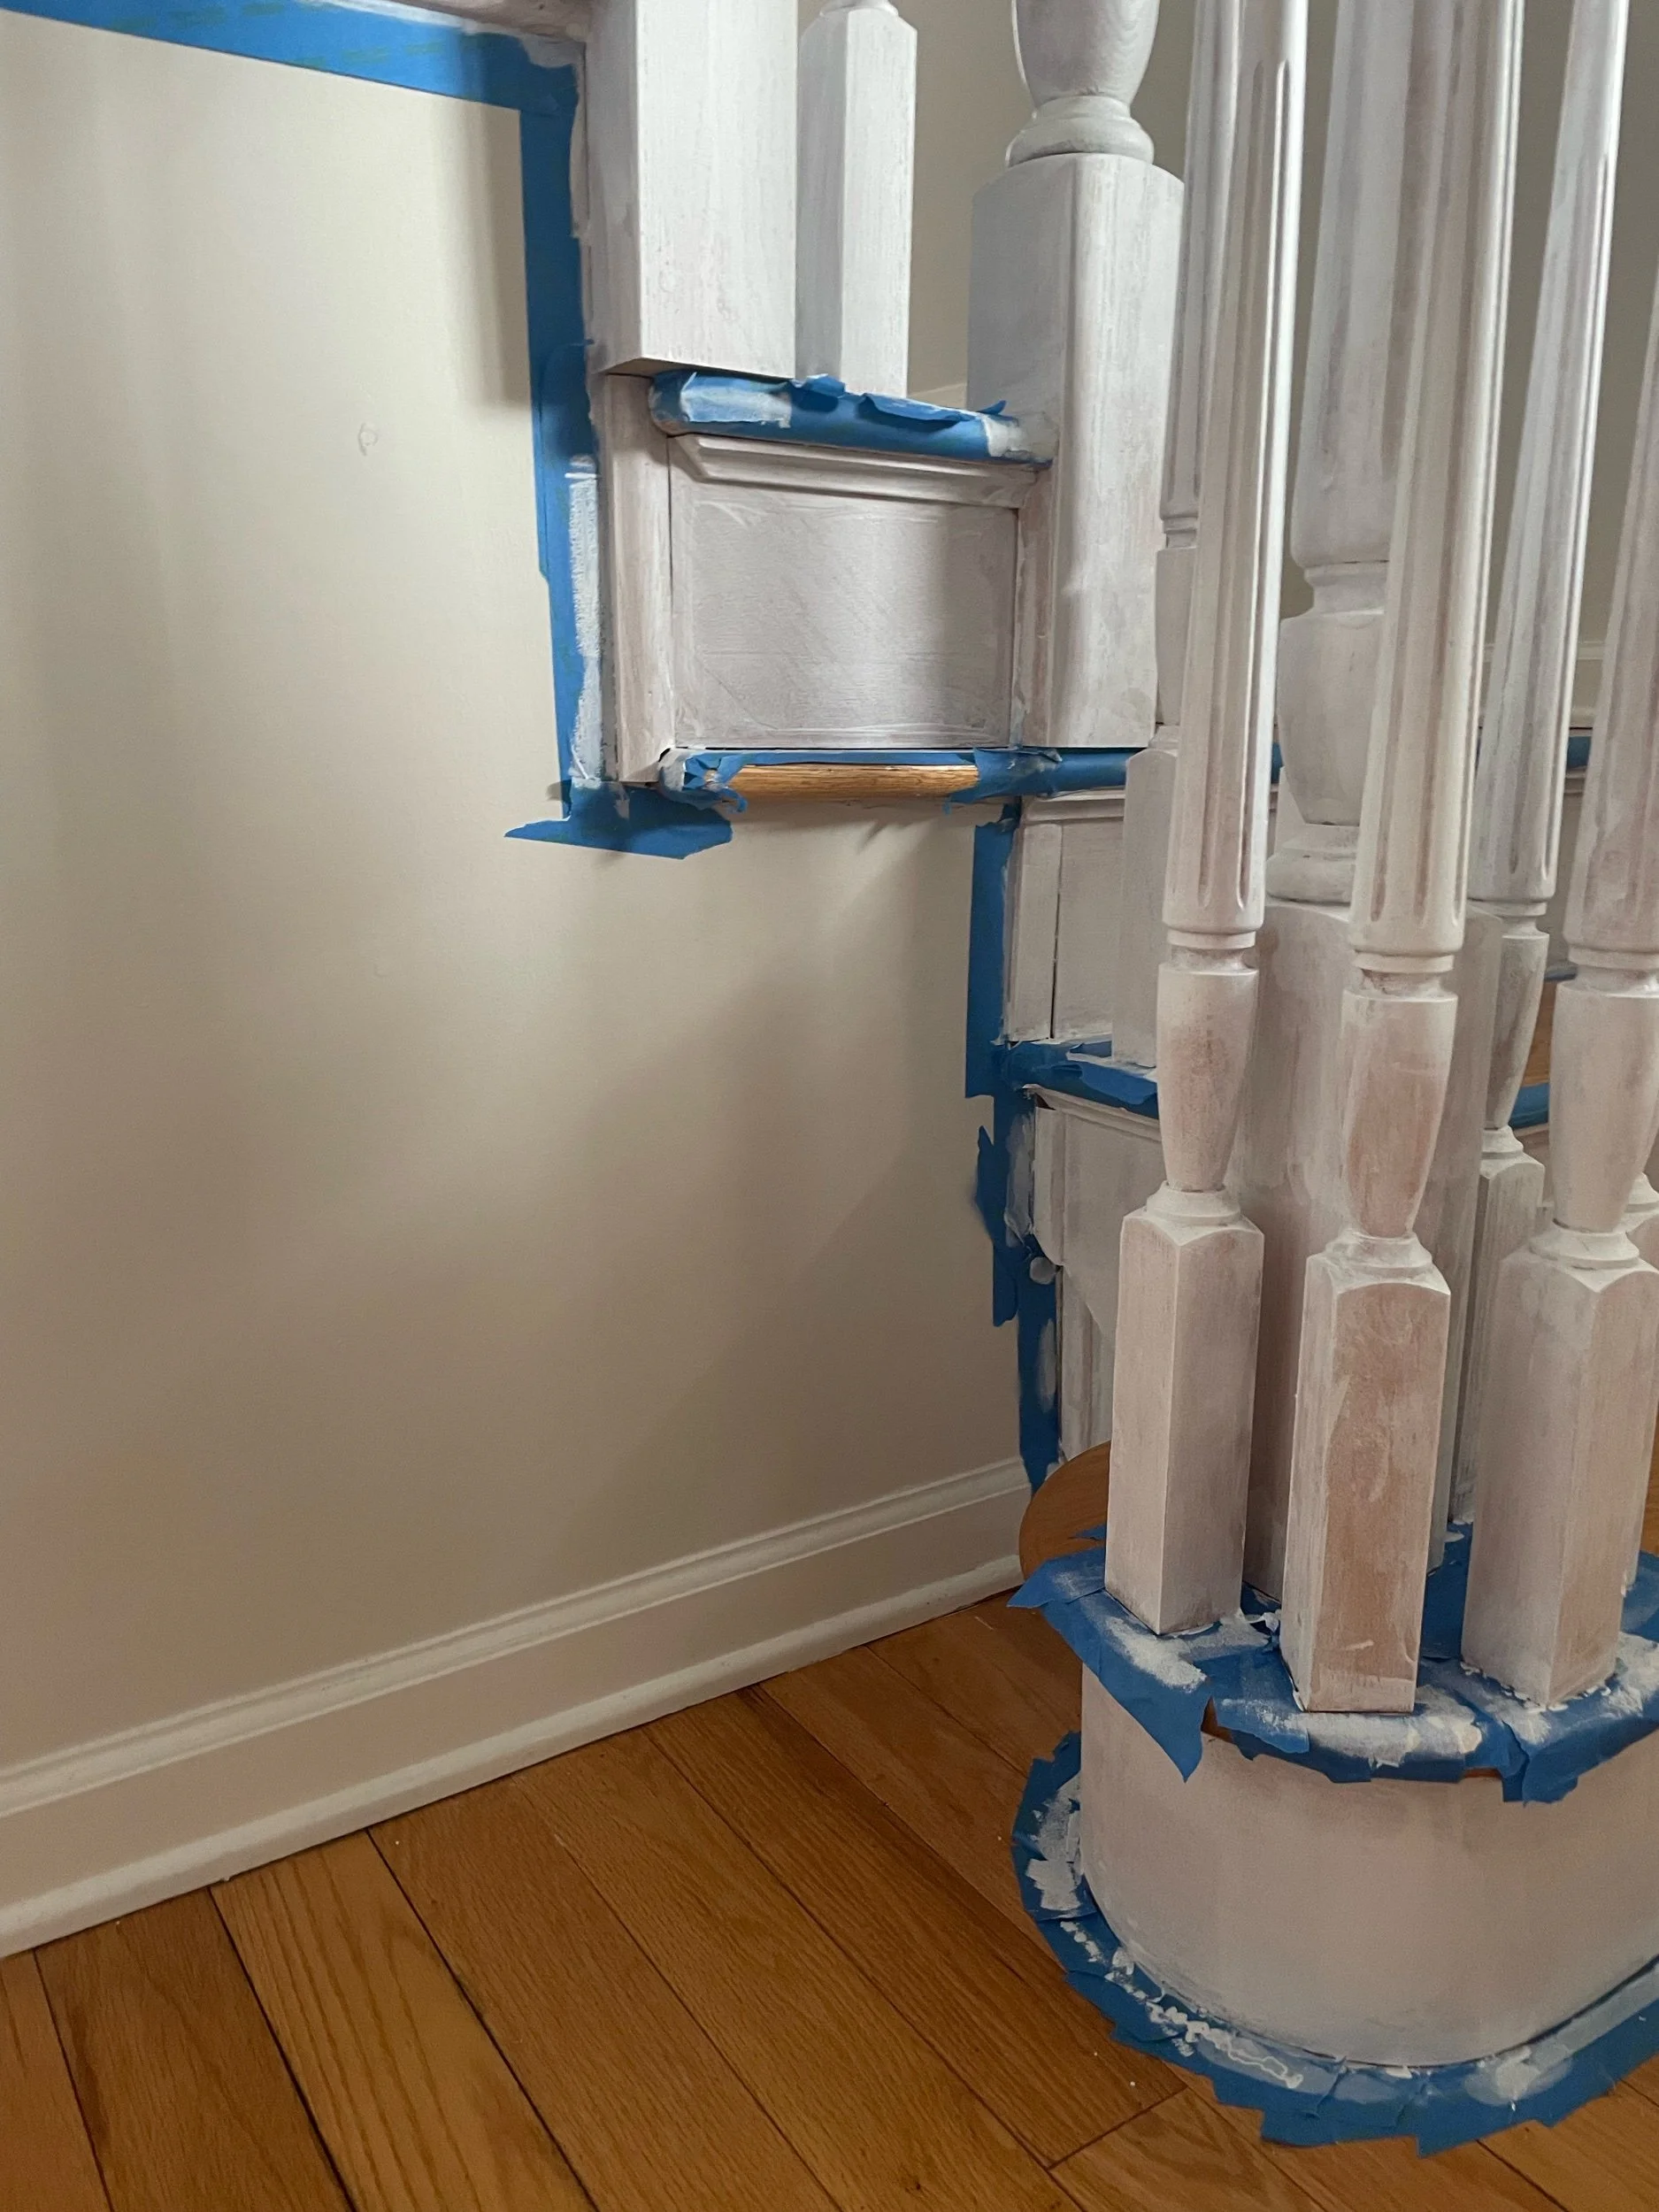
Day 5 was the following Monday- I started my first coat in Benjamin Moore, White dove in a semi gloss to match my doors and trim in my home. Just to brighten my front entry way completely. The first section I started to tackle was the curled spindles at the bottom, because I knew it was going to be the most time consuming and the hardest to complete. For this section it was curial for me to get a shortcuts paint brush to get into the tighter areas easier without scraping all the other spindles in my way. For the tops of each spindle, I used a much skinner paint brush to get the least amount of excess paint. For all the bottoms of each spindles and trim on the risers I used the shortcut brush, from top to middle of each spindle and the entire riser I used a cabinet roller. So day 5 I got to maybe two sections of my first coat of my spindles and risers.
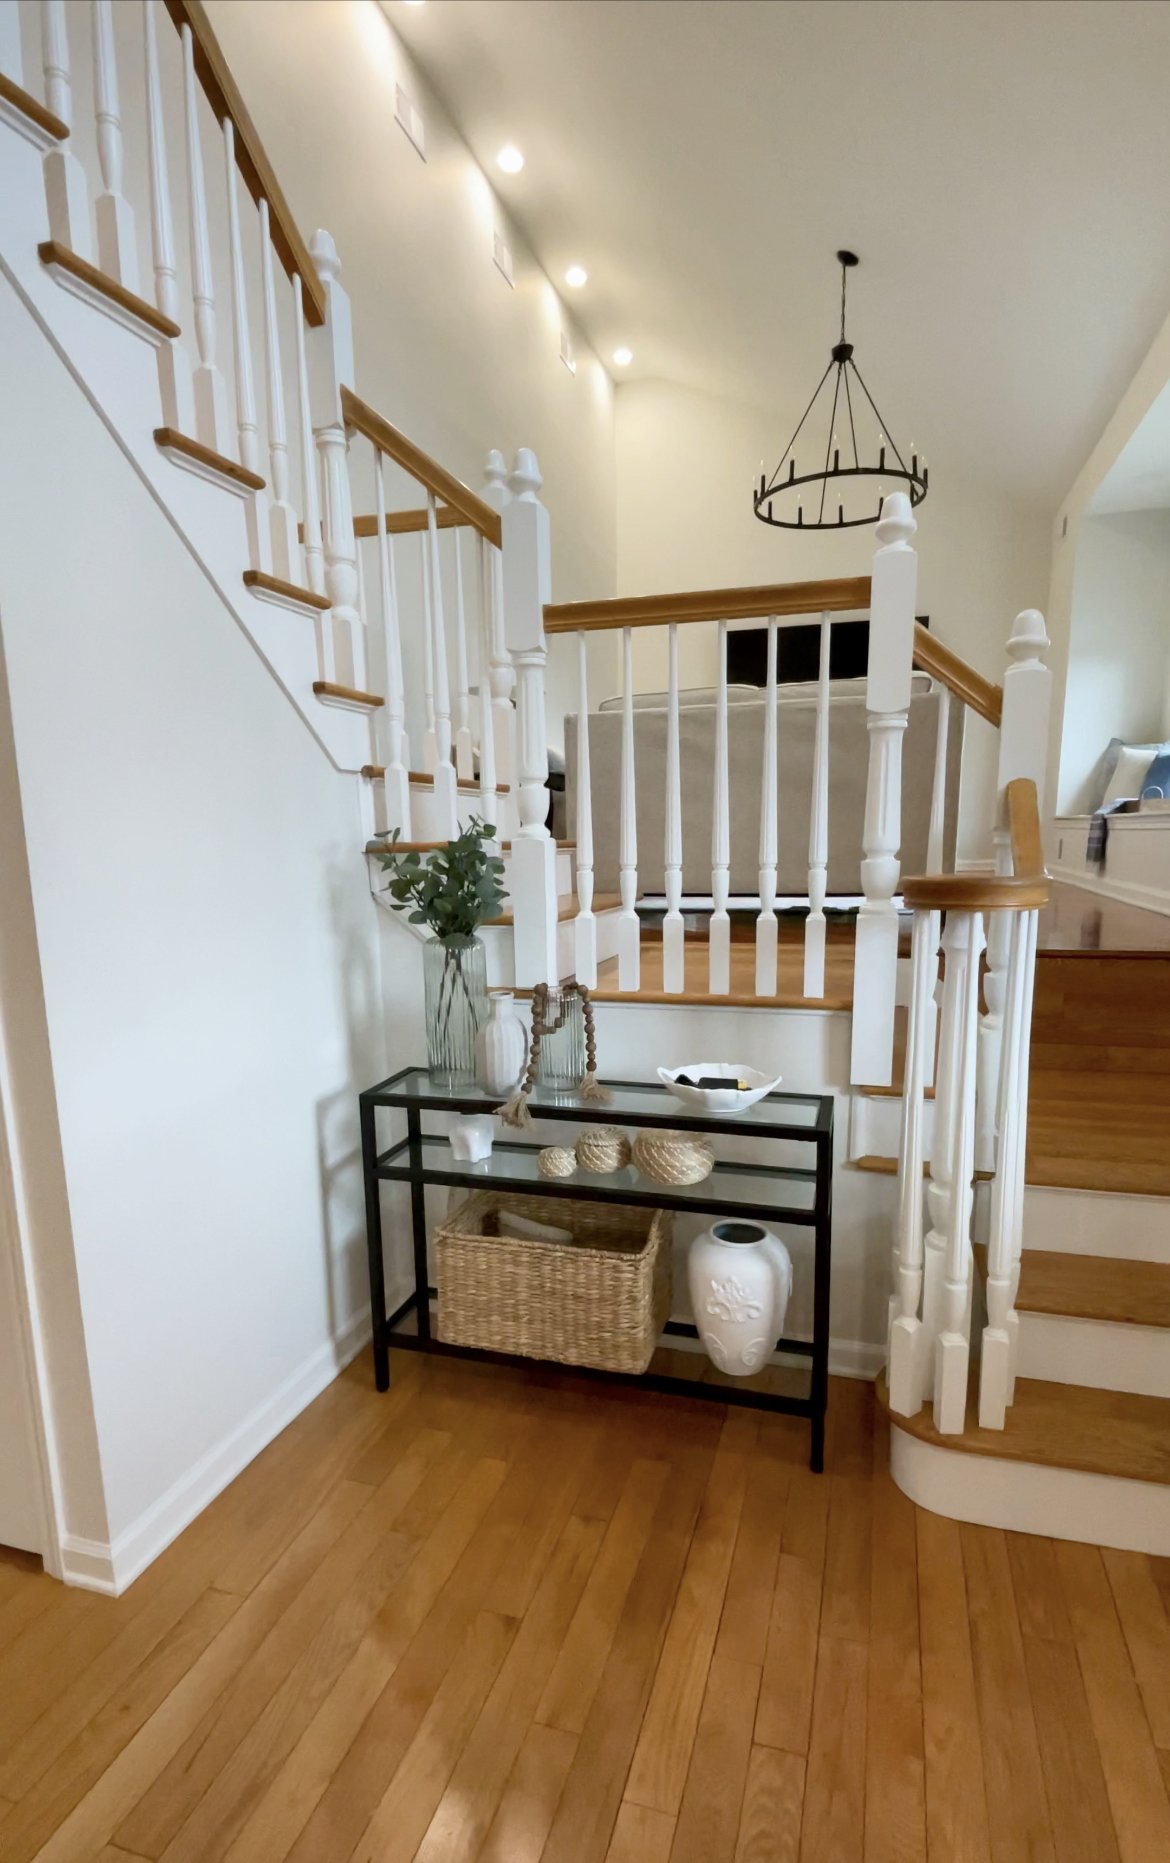
Day 6 was another big one. I started at 11 am and stopped at about 6 pm and completed finished my first coat everywhere. What an accomplishment lol. I started from the top and went back down to the bottom. Day 7 we finally made it and exhausted myself. But we finished the whole second coat in one day with Dans help and let it dry overnight. Day 8 was just as hard but so rewarding it looks absolutely fabulous the sun that comes in that morning it was like angles singing ! it went from drab oak overload to light and airy! After soaking the results in with a cup of coffee, it was time to get to it. I started off my peeling all the tape from everywhere. After peeling the tape I took a scrub daddy, a rag, scraper, and a little tubber wear with dawn and hot water to scrape and peel all the excess paint from the wood. After this tedious part was done i then vaccuumed up the mess and mopped all the wood floors and was stunned allover again. All the hardwork and effort was absolutely worth it and it was on a total budget. To be honest it was pretty much free, I had all the paint and primer left over. I just needed new rollers and a tray and the shortcut brush.
Especially with all my upcoming events. We haven’t had a break. Buying the house, getting engaged, having a baby, throwing all the events in between OH and getting married in 2024! This was just a great DIY that didn’t even use a gallon of paint or primer and was super inexpensive and in reality if I wasn’t a tired momma it would’ve took me a little less than a week to accomplish this! Anyone can tackle this and really transform their own space to make it their own even if its not forever it makes a huge difference! I hope I inspired someone to do the same ! Until next time xo